
Is ON1’s Photo RAW, now in version 2024, ‘better enough’ than Lightroom Classic to be worth a switch? After using Aperture (until it was discontinued), Capture One (for a few years), and now Lightroom Classic (for several years), Lightroom Classic has become my standard against which others are judged. To be worth moving to another program, it has to have something pretty good going for it.
Both programs have been updated this fall. Lightroom added a very powerful Point Color tool bringing it in line with Capture One’s excellent color controls. Photo RAW offered a bit more of an overhaul with a new user interface, better performance (especially between Browse and Edit), and Brilliance AI – its version of creating an automated starting point for further editing. But does Photo RAW offer anything that Lightroom Classic does not?
The short answer is no.
But, of course, it’s not that simple. Both programs are powerful and capable. It is the more subtle things that make the difference to me. And, truth be told, if I had been using Photo RAW for as long as I’ve used Lightroom Classic and was making the comparison from the opposite side of the fence, Lightroom Classic may not offer enough for me to switch to it from Photo RAW.
Nitpicks
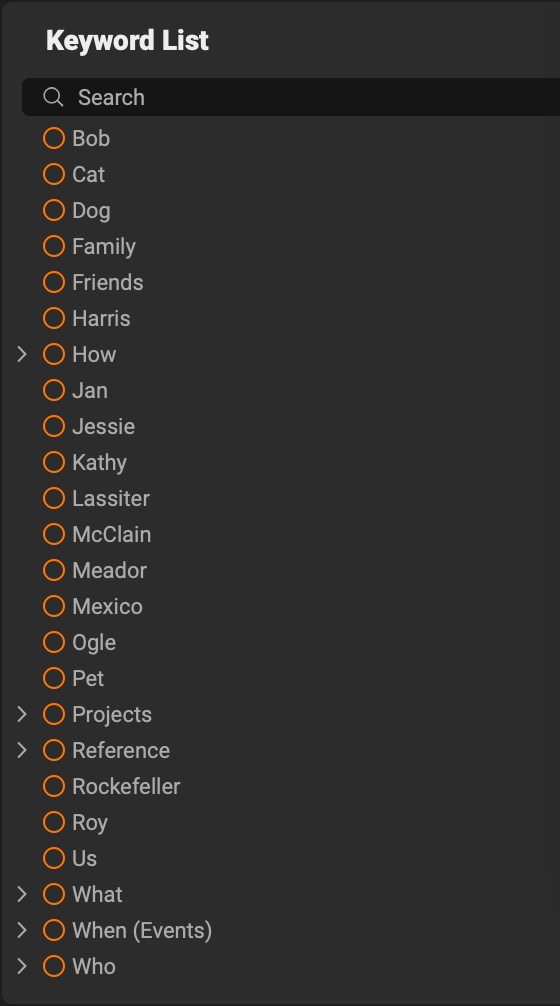
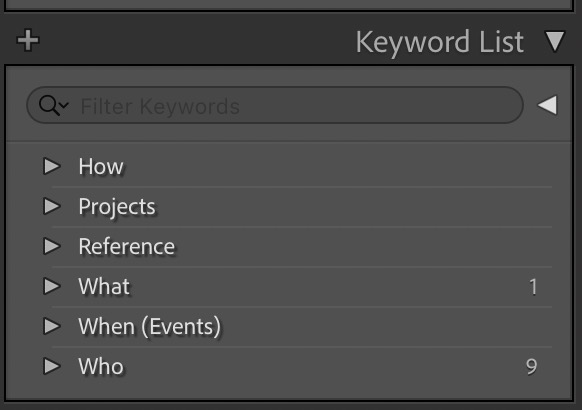
First, a couple of nitpicks that irritate me about Photo RAW that probably make no difference to anyone else. First up is what Photo RAW does with my Lightroom Classic keyword list. Where is it finding all these root-level keywords!?
I know, it’s not that hard to clean up Photo RAW’s keywords. But any transition means I’d be using both programs for a while and would have to keep two keyword lists in sync. I said these are nitpicks.
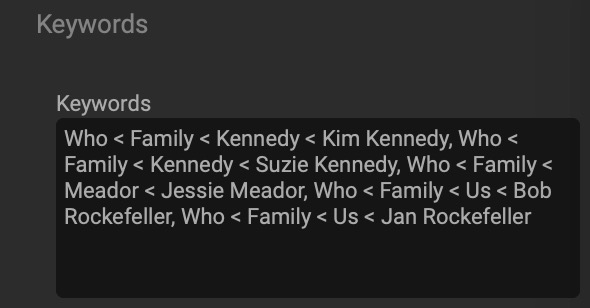
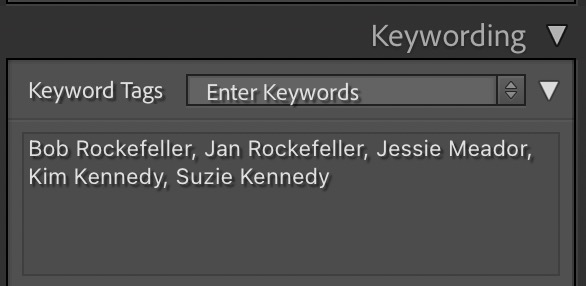
And then there’s the display of keywords in the metadata pane. Lightroom Classic’s display is clean and straightforward; Photo RAW’s is a complicated mess. Both programs are using the same hierarchy for their keyword lists.
While I’m on the subject of metadata, here’s another irritant. Lightroom Classic’s metadata presets can clear a given field if it contains a value. Photo RAW’s presets cannot; so if there’s something in the metadata I typically want to clear (some cameras put weird things in their metadata that I want to erase), I have to delete it manually.
Photo RAW sill does not sort images in Browse properly by capture date. A .raf file and a .dng file of the same image with the same capture date and time, do not sort beside each other. Lightroom Classic, of course, has no such problem.
More Significant Differences

Photo RAW 2024 is faster than 2023, but not as fast as they tell you or as they demonstrate. Switching from Browse to Edit is quick, but watch for the progress bar at the lower right. You can’t start any edits until some processing is complete and that’s not instant and does take a minute. Lightroom Classic is nearly instant.
I use print presets all the time for changing paper sizes and types requiring different margins and ICC profiles. Photo RAW has none; Lightroom Classic’s are very capable. That’s a bit of a surprise considering how much Photo RAW uses presets in editing.
Lightroom Classic has had stacks in its Library since almost the beginning. These stacks are a very handy way to collect like images and collapse them into a single thumbnail.
Think of a set of portrait images that are almost the same, but different enough to keep several. Group them into a stack and put your favorite on top. Or perhaps you have different treatments of the same image; you can stack the original along with a black-and-white version and maybe a few color interpretations. For a panorama, stack all the source images and put the completed combination on top. This is handier than you may think and Photo RAW has no equivalent.
While it is open to discussion for personal taste and the camera body in question, I find Photo RAW’s raw conversion and lens corrections to be OK at best. In my tests, DxO PhotoLab does the best at both these things with Capture One a close second and Lightroom Classic a close third. Photo RAW 2024 helps a little in its use of Brilliance AI to quickly get you to a starting point for editing, but if the accuracy and detail haven’t been extracted from the raw file, they can’t be created later.
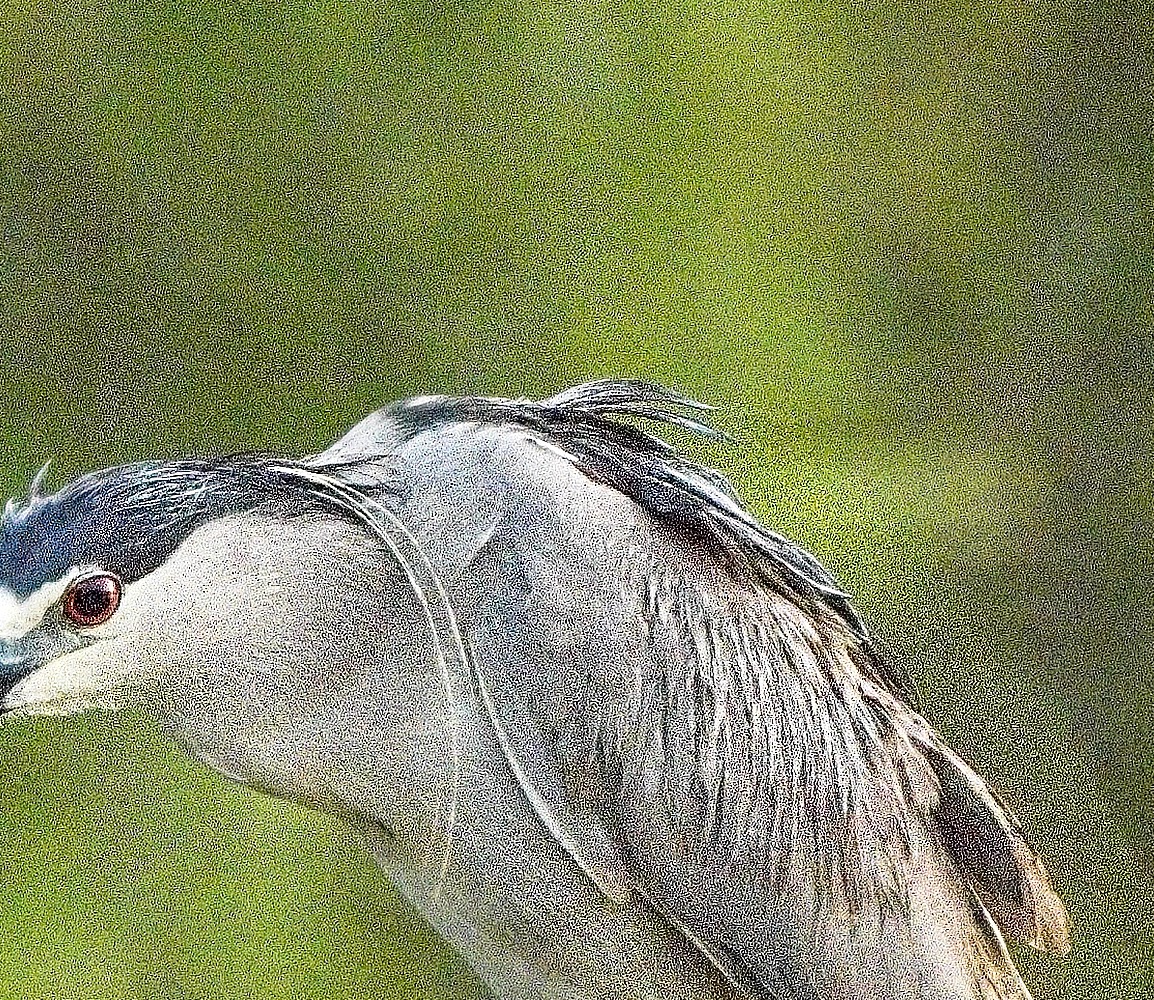
Photo RAW’s Tack Sharp adjustment is nearly useless for me. It creates horrific artifacts almost every time I try it. Lightroom Classic has no direct equivalent to Tack Sharp. But it does have its own, very good, global sharpening tool that works very well for my images.
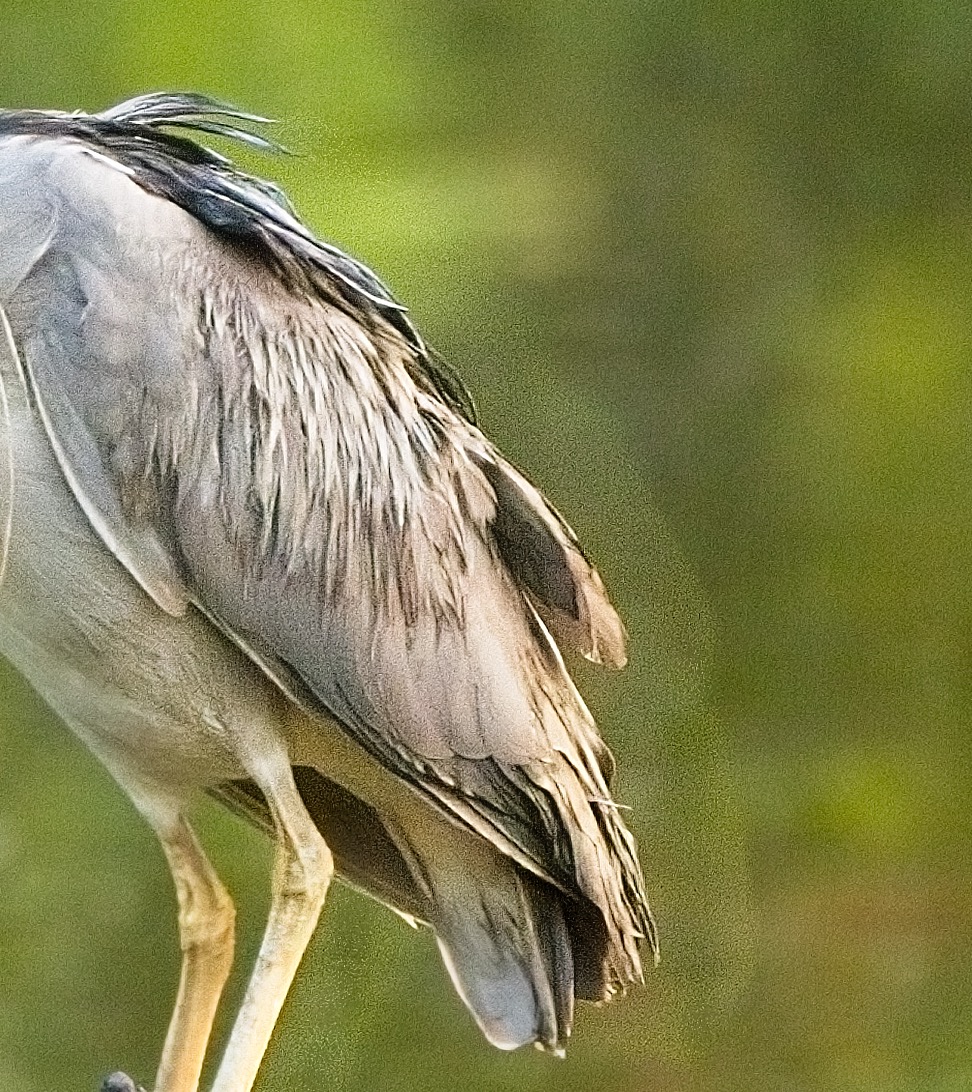
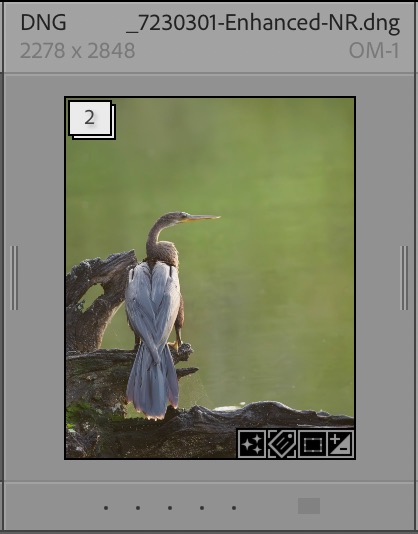
AI Masking algorithms are very much a competitive point in photo editing software today. Photo RAW has had its tool for some time; Lightroom Classic added theirs more recently. ON1 introduced a pretty serious AI Masking bug in P{hoto RAW 2024; take a look at the ghost created in the screenshot to the right (click to enlarge). The whole AI mask for the bird is offset!
DxO PhotoLab is still the King of noise reduction, in my view, but Adobe has done a very fine job with theirs. By combining Lightroom Classic’s denoise and sharpening tools, I find I can get pretty close to PhotoLab’s results. Photo RAW’s No Noise is just good enough.
Photo RAW Advantages
You might be wondering if I find anything about Photo RAW that’s better than Lightroom Classic. There are a couple of small things. Photo RAW’s lack of a traditional catalog does make adding photos to the library a bit easier. And its search function allows for both AND and OR search combinations.
I’m a fan of interface consistency, which is one reason I’m so fond of Macintosh. In that regard, ON1 has topped Adobe. Dialog boxes share the same interface color and style as the rest of the program, for example. The new Photo RAW 2024 interface is better looking and somewhat more organized than the 2023 version, and it holds together in use better than Lightroom Classic’s.
Brilliance AI is an interesting way to automate the process of taking a raw image and making it your own. It is not an endpoint, and can often be overdone if left to its defaults, but it provides a starting point. My tendency is to make my own adjustments when I see the need. I’m not saying I would never use Brilliance AI, but it’s not an important feature in my workflow.
Perhaps there are things about Photo RAW that work better for you. But these small things are about all I can find for me.
Conclusion
It’s not too hard to see why I’m sticking with Lightroom Classic. I know that many people object strongly to the subscription model Adobe uses, but for $120/yr (less, if you can hit a sale), you get Photoshop and Lightroom Classic. Photo RAW can be had for $80/yr (using annual updates) but I don’t see that cost difference as a deterrent; after all, I spend much more than $40/yr on camera gear and photography outings.
I fully understand that others may well come to a different conclusion than mine. Photographers use different camera bodies, employ different photo editing techniques, and capture different subjects. Portrait photographers, for example, have different needs from wildlife photographers. So you may value other features of Photo RAW that I do not. Or you may not use the tools that give me problems in my photography. But for me, it’s going to be Lightroom Classic until another program can top it for my needs.
Leave a Reply